

Whether you're interested in fashion illustration, digital art, or just enjoy drawing clothes, learning how to draw a leather jacket can be a fun challenge.
Leather is expressive and complex due to its glossy surfaces, realistic folds, and complex textures. Whether you're drawing a tough vintage style or a sleek biker jacket, you need to know the expert tips and tricks for it.
This is why we are here to help.

Why Leather Jackets Are a Drawing Challenge
The material leather is dynamic. When worn, it creates intricate folds and wrinkles and reflects light differently than cotton or denim.
To visually depict this, one needs to:
- Have an understanding of anatomy (to see how jackets fit the body),
- Knowledge of lighting and fabric movement,
- And creative mastery of texturing and shading methods.
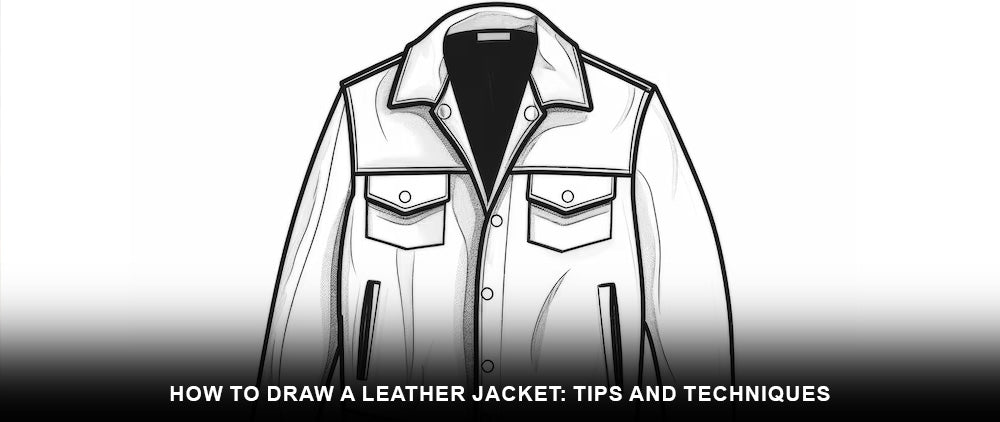
Zippers, hardware, lapels, and seam lines are additional distinctive features that lend depth to a leather jacket. Realism stems from the details, whether it's a jacket drawing around the waist or creating a front-facing design.

What Do You Need to Draw a Leather Jacket?
First of all, you need a better understanding of leather jacket styles. You can draw digitally with a tablet and stylus or with a conventional pencil and paper. Keep these resources close at hand, regardless of the medium:
- For base outlines, use light graphite pencils or a digital sketch brush.
- To make changes, use an eraser or undo tool.
- To render folds, use blending tools, shading pencils, or a soft digital brush.
- To create the illusion of shine, use a white gel pen or highlight brush.
- References – for accuracy and direct guidance, keep the images of real jackets or collections like men’s leather motorcycle jackets or women’s motorcycle jackets.
Step-by-Step: How to Draw a Leather Jacket
Don’t know where to start with the drawing of a jacket?

- Build the Base Sketch (Structure First)
Make a quick sketch of the base figure before concentrating on the jacket. This will dictate the shape, fall, and positioning of the jacket.
- Using stick figures and simple shapes, sketch a rough torso and arms.
- To create a mannequin or to draw the body's silhouette, add volume.
- Next, start shaping the leather jacket outline around it.
Tip: Look at a picture of someone wearing a leather jacket or use a mirror to see how the jacket hangs or hugs the body.

- Define the Jacket’s Style and Shape
The 2nd step is the shaping of style.
- Draw the position of the sleeves, armholes, collar, and shoulders.
- Sketch typical features such as front zippers for motorcycle jackets, ribbed hems for bombers, or lapels for biker jackets.
- Draw how it will fit around the hips or waist; will it be oversized, cropped, or cinched?
This is also the point at which knowing how to draw jackets comes in handy. If your jacket is front-facing, pay particular attention to symmetry.

- Add Details: Seams, Pockets, and Zippers
This is where your leather jacket drawing easy tricks help you make a shape. Make sharp, clean lines to add:
- Stitch lines and shoulder seams
- Side pockets and the chest
- Zipper teeth and cuffs
- Belts with buckles or button snaps
Consider the construction of realistic jackets. Make use of real-world examples, such as leather jacket designs.
Make sure to draw the shirt or inner lining underneath if you're doing an open jacket drawing.

- Sketching Leather Folds and Wrinkles
Imitating the way leather folds is one of the most important aspects of how to draw a leather jacket. Leather has more noticeable and heavier wrinkles than softer materials, and they frequently appear around the:
- Elbows
- Underarms
- Waistline and cuffs
- Back shoulder blades
To record these:
- Where compression occurs (such as bent elbows), draw overlapping, jagged, curved lines.
- To make folds deeper, use sharp shading.
- If necessary, start by practicing drawing sleeve wrinkles.
You must visualize movement at this point. Is the jacket still hanging? The arm is bent, right? Is the waist taut? The way the leather jacket folds is impacted by all of this.

- Shading & Highlights: Texture Time
Leather has a semi-glossy finish. Now, how do you start the paper?
- Shade the deepest folds with midtones and dark shadows.
- Clean highlights can be used to show how light strikes the smoothest surfaces, such as the tops of the shoulders or chest.
- When drawing in black and white, provide plenty of white space for reflection.
- Use color gradients to indicate tonal diversity; for example, make flatter parts lighter and darker around zippers or seams.
Learn how to draw leather jackets in other settings, such as bags or shoes, to grasp their sheen and ensure accurate rendering.

Pro Tips for Better Jacket Drawings
While you prepare to draw, here are some expert tips for the drawings:
- Consider real coats by browsing catalogs or trying one on in front of a mirror. You will learn the exact positions of folds and seams.
- Before working with leather, practice drawing on denim or wool to get a feel for it.
- Layered drawing, especially using digital tools, allows you to sketch, structure, detail, and texture in separate layers.
- Maintain an asymmetrical layout. Leather does not fold evenly on both sides; rather, it folds organically.
- When done properly, rivets, studs, and zippers may become focal elements.

Next Steps for Artists and Designers
Do you want to take your leather jacket sketch from simple to portfolio-worthy? Think about:
- Researching the origins of leather jacket design inspiration from rebellious, cinematic, and aviation cultures.
- Using actual jacket fits as a guide, improve character design to find the perfect fit.
- Investigating color schemes for rendering different leather finishes, such as distressed, gloss, vintage, and matte.
Conclusion
Drawing a leather jacket is more than a study of folds and textures—it's an artistic journey through culture and craftsmanship. From learning how the fabric folds to adding small details like zippers and seams, it all makes your drawing more real.
As you sharpen your drawing techniques, take inspiration from real-world craftsmanship like that found at Daniel Smart, a name known for authentic, high-quality leather gear.
To add depth to your creative process, explore the fascinating history of leather jackets and discover how this iconic garment evolved from a utilitarian item to a bold fashion statement.
FAQs:
- How to draw a leather jacket with a pencil?
To make a realistic-looking pencil drawing of a leather jacket, start with simple forms and then add details like the collar, sleeves, and stitching. Highlight and shade the leather to reflect light and define its texture.
- How to draw a leather texture?
To produce a leather texture, add slight grain to a clean mid-tone base with dots or tiny irregular lines. Highlight elevated or stretched parts to provide a sense of shine, and shade dramatic, gentle folds where the leather bends. To achieve a realistic appearance, blend gradually and use contrast to show thickness and aging.
- What can I use to draw on leather?
Patterns can be marked and transferred onto leather using soft graphite pencils, paint markers, or specialty leather paints. Irons and pricking wheels can be used for permanent markings, such as sewing.
- Are leather jackets in style in 2025?
The majority of people are still wearing lightweight leather coats, and this trend is expected to persist past 2025.
- How can I style my leather jacket?
You can pair your leather jacket with tailored pants or a dress for a smart-casual look, or with jeans and a t-shirt for a more relaxed look. You can also pair it with a hoodie for a street look. Choose sneakers or boots that complement the style.
- How do you shade skin with pencils?
When shading skin with pencils, begin by creating a light base layer with an HB or 2H pencil. To progressively increase the tones, use softer pencils such as 2 B - 4 B, then softly blend them with a tissue or blending stump. To get a smooth, natural-looking skin appearance, use light pressure, layer gradually, and leave highlights alone.