



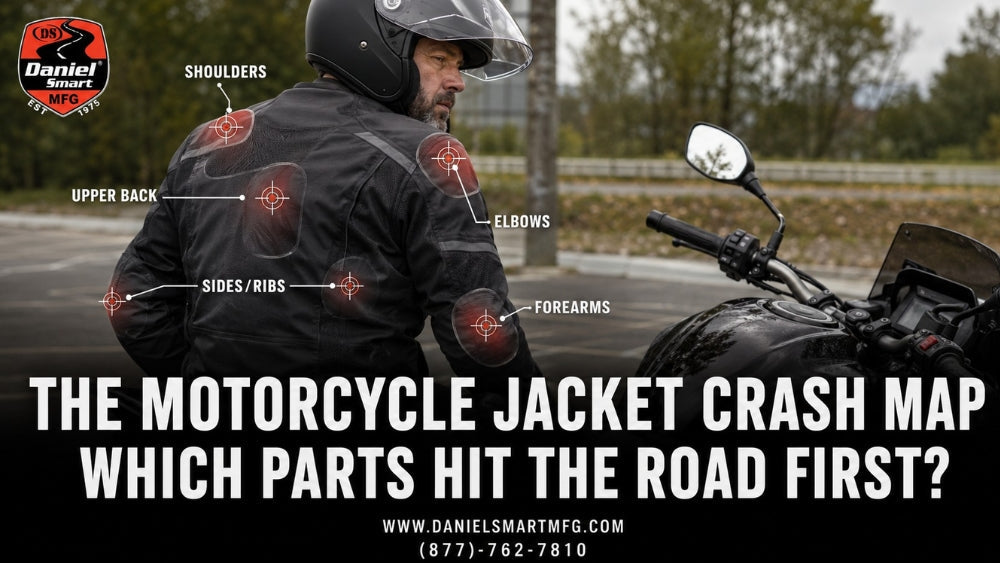
Hitting the road or hitting the pavement leaves different impacts. An adrenaline rush from one and wounds from the other. But when you hit the road or pavement in an accident, what parts hit it first? This is a question of safety that every biker should know. Once you have the answer, you can easily choose the right gear, including the jacket for your safety.
Previously, we explored important motorcycle safety topics, including the differences between CE Level 1 and Level 2 armor and whether CE Level A protection is sufficient for motorcycle riding. Building on those fundamentals of protection levels and armor standards, the next step is understanding how and where the body actually impacts during a crash.
So, today, in this short guide, let’s understand the motorcycle jacket crash map so you know where your jacket is supposed to work harder.
What Areas of the Body Hit the Road First in a Motorcycle Accident?
Orthopedic and forensic studies of crash data tell a consistent story. When a rider enters a slide-out or lowside, they often throw an arm out to try to catch themselves. That’s why upper-extremity injuries account for about a third of all motorcycle crash injuries, with the shoulder girdle being the worst offender.
The second most common upper body injury after shoulder injuries is a forearm fracture. In a low-speed slide, legs and feet, closest to the ground, are often the first to contact. The chest, back, and hips get the impact a little after the rider is totally down and sliding.
That’s the logic behind the motorcycle jacket crash map: each zone fails differently, so Motorcycle safety gear needs different protection strategies.
Which Parts of the Body Hit the Road: Motorcycle Jacket Crash Map
Here are the body parts that hit the road first, and therefore, you must find a motorcycle riding jacket accordingly for safety measures:
-
Shoulder zone
When a rider goes down on their side, it is often the shoulder that takes the brunt of the impact. Both the first shock and a lot of the sliding friction that comes after.
-
The real protection is CE-rated shoulder armor (EN 1621-1), not foam padding.
-
The armor should sit directly on the joint and not move around when you lift your arm.
-
Shoulder panels of reinforced or double-layer leather reduce abrasion during a slide.
Less expensive jackets tend to use thin foam that looks good on a hanger, but does much less in a fall.
-
Elbow and Forearm Zone
When riders fall, they instinctively throw an arm out to break the fall, which places the elbow and forearm in the second impact zone on the crash map. Crash data show forearm fractures are common enough that jacket makers treat this area as a priority, not an afterthought.
-
Elbow armor should protrude slightly beyond the joint, on either side.
-
Forearm panels are best made of abrasion-resistant leather or high-denier textile since this area slides more than it strikes.
-
The sleeves are pre-curved to hold the armor in place as the arm moves, more than most riders expect.
-
Back Zone
Usually the back doesn’t take the first hit, but it takes the longest slide and protects the spine. The one piece of armor that is most likely to save you from a serious injury is a back protector.
-
Get a full-length back protector, not one of those little foam pads.
-
Level 2 back protectors absorb and dissipate more impact force than Level 1.
-
When in a riding position, the panel should remain flat against the spine, not ride up.
-
Hip-waist Overlap Zone
This is the area most riders overlook, and it is a weak point in many budget jackets. The hip-waist overlap is the spot where the jacket meets the trousers, and it is a common gap point when the jacket rides up during a slide.
-
A good jacket has a waist-to-connect zip to lock it to riding trousers.
-
In the case of hip armor (if there is any), it should be at the actual hip bone, not several inches off.
-
Adjustable waist straps prevent the jacket from riding up during a slide, maintaining the connection zone.
Without that connection, a slide can expose bare skin at the waistline in seconds, making it one of the more preventable gaps in motorcycle jacket protection.
-
Seam Zones
The seams are the most likely place for a jacket to fail under load, and they're rarely talked about compared to the armor.
-
Double or triple stitched seams will be much more resistant to abrasion and tension than single stitched seams.
-
Sew seams directly on high-friction areas (shoulder, elbow, back) with reinforced thread, not construction thread.
-
Leather jackets generally outperform textile jackets at the seams during a slide because the material is less likely to rip from friction.
A jacket can have excellent armor and still fail if a seam bursts when it's hit.
Which Parts of a Motorcycle Jacket Protect You in a Crash?
When you look at the motorcycle jacket crash map, it highlights five key areas that are crucial for protection: the shoulders, elbows, forearms, back, and the hip-waist connection. The seams are what hold these areas together, and if a seam is weak, it can compromise the effectiveness of the armor anywhere on the jacket.
Material choice plays a big role here too. Leather motorcycle jackets generally offer better abrasion resistance compared to most textile options. This is why they remain a go-to for riders who prioritize crash protection over factors like packability or ventilation.
Choosing Gear with the Crash Map in Mind
Here are a few handy tips for anyone on the hunt for motorcycle gear:
-
Make sure to look for CE-rated armor in the shoulders, elbows, and back, and don’t settle for just a vague "padded" description.
-
When it comes to men’s leather motorcycle jackets designed for riding, they should clearly mention armor pockets and CE ratings in the product details. If you can’t find that info, it’s a good bet the armor isn’t rated.
-
Remember to buy your motorcycle helmet while shopping for the jacket. They work together as a complete safety system.
-
Don’t forget to try the jacket on while in a riding position instead of just standing up. Armor that feels fine when you’re upright might shift around when you lean forward on the bike.
-
Make sure to wear full motorcycle gear- jacket, pants, gloves, boots, and helmet - since a jacket alone can’t cover all the gaps.
Conclusion
Understanding the motorcycle jacket crash map helps riders make smarter decisions about their protective gear. Knowing which areas of the body are most likely to hit the road first allows you to prioritize jackets with CE-rated armor, reinforced seams, and durable materials. They provide reliable protection against impacts and abrasions.
While no jacket can eliminate every risk, choosing quality riding gear significantly improves your safety on every ride.
Daniel Smart MFG offers a wide range of premium motorcycle jackets crafted for comfort, durability, and protection, helping riders stay confident on the road without compromising on style, performance, or everyday practicality.
FAQs
-
How should a motorcycle jacket fit for maximum protection?
A motorcycle jacket should fit snugly without restricting movement, keeping armor securely over the shoulders, elbows, and back throughout your riding position and movement.
-
Is a leather motorcycle jacket safer than a textile jacket?
Leather generally provides better abrasion resistance during slides, while advanced textile jackets can offer excellent protection when equipped with CE-rated armor and reinforced construction.
-
How often should I replace my motorcycle jacket?
Replace your motorcycle jacket after any significant crash or when armor, seams, or materials show damage, excessive wear, or reduced protective performance over time.